The workflow editor is an interactive UI that lets you define a business process. For example, the process to manufacture, rework or repair an item. The process is made up of a sequence of steps that are required to execute the process. The steps are made up of high-level operations and each operation is made up of one or more actions. Each action is the definition of a screen that is presented to the operator that either defines the data they must see or the data they must record.
The Design Workflow functionality allows you to build the end-to-end process for making a product and it only applies to workflow versions that have a Draft status.
You must have created a workflow type, workflow headers and version before proceeding to the design of the workflow. This documentation focuses of the workflow design. For more information on workflow headers and versions, see Workflow.
A workflow consists of a sequence of nodes with flows between them and the conditions for those flows. A node may be one of the following types:
- Start node
- Operation node
- Parallel node
- Jump node
- End node
This is an example of a workflow created in the workflow editor.

To design a workflow follow the instructions below:
- Navigate to the Workflow page, search for the workflow you want an select the workflow version you want to design the workflow for.
- Click the Design Workflow button to display the design workflow editor. If this button is not displayed, it's because the workflow version you selected is not in the Draft status.
Nodes can have multiple flows out, either if they are in parallel or if they are conditional. Conditions are defined on the flows to determine where work is routed to. When conditions have not been defined, the flows are displayed as dashed grey arrows. A Workflow cannot be used if the conditions are not defined.
Start nodes
The start nodes defines the trigger to create a new task and or material item to be completed (e.g. production, repair, rework, etc). Note that you can't have multiple conditional flows out of a start node.
- Navigate to the Workflow screen and select the workflow version.
- Click the Design Workflow button to open the workflow design screen. Note that the design workflow functionality only applies to workflow versions that have a draft status.
Select the type of start node you want to create. The options are Start New Task, Start Post Conversion, Start Scheduled New and Start Scheduled Existing.
Start New Task
Workflows with a Start New Task node are available to be used for tasks created during the course of a works order on a WIP item. It can be ad hoc tasks triggered manually by an operator, not through workflow, and it is not planned. It can also be planned and spawned through workflow via a Jump to Task which is usually required for sharing a sub process. Examples could be for a shared task, a non-conformance workflow or a rework workflow. For information on rework scenarios, see Rework.
Tasks created against workflows with a Start New Task node can be triggered manually from the workstation or can be routed to automatically from a Jump To Task node in an underlying workflow.
Note that a scheduled works order cannot be generated against a workflow that only has a Start New Task start node.
There are two scenarios for jumping to a task:
- A jump node in a workflow: This scenario is planned and is spawned through workflow via a Jump to Task node that triggers a sub process that could be shared. When you complete the sub task and return to the main task the flow out of the jump node will determine which operation you return to. The Sub Task Return Mode field in the End Complete node is therefore irrelevant in this case.
- An ad hoc jump to a subtask: In this scenario, you may be in the middle of an operation's actions when a subtask is spawned manually and unplanned by the operator. In this case, when you complete the subtask that was spawned, you need to know what to do on the actions on the operation that spawned the subtask. In the sub task workflow, the Sub Task Return Mode field in the End Complete node which is discussed at the end of this section, defines where to return to in the spawning operation.
- To create and edit a Start New Task node:
- Right click, mouse over Start, and select Start New Task to create a Start New Task node.
- Right click the Start New Task node and select Edit to display the Edit Start Node input screen.
- Complete the Edit Start Node input screen.
Add/Edit Start Node input screen
The following properties can be defined for Add/Edit Start Node:
Blue fields in the form are required and are flagged with an asterisk (*) in this document.
- Name*: The name of the Start New Task node.
- Start Mode*: When you trigger an ad hoc new task, for example, a rework task., you can specify what the operator does. Options:
- Book Off: The operator books off of the source operation while the spawned task is worked on and returns once the spawned task was completed. This might be required if the new task starts in a different area or team, e.g., non-conformance area.
- Stay: The operator remains booked onto the source operation and continue working on that operation. For example, when the spawned task is completed by someone else.
- Follow: The operator follows the work to the spawned task.
- Start workflow task asynchronously checkbox: If ticked, then the spawned task can run in parallel with the originating workflow. If unticked it's a synchronous start node meaning that whilst the item is in the rework workflow, it will be suspended in its originating workflow.
- A Complete end node can be configured on a flow of this kind to specify where (i.e. which action) in the underlying source operation you would like to return. The fields are:
- Name*: Name of the end node.
- Sub Task Return Mode*: Determines where you return to in the workflow you jumped from. Options:
- Complete Current Action: Returns you to the action after the one that spawned the subtask.
- Restart Actions: Returns you to the first action of the operation that spawned the subtask.
- Resume Current Action: Returns you to the start of the action that spawned the subtask.
Start Post Conversion
There's a process where you can convert a material from product A to product B. For example, you have a Basic PC (A) and a Deluxe PC (B) where the deluxe model has an additional graphics card. To convert from A to B, you will need to perform tasks such as fit the additional graphics card and perform quality checks. The Start Post Conversion is the work required when you convert product A to product B. At the end of workflow to produce an A, you will have a Convert end node that will convert the A to the B and the B would pop up on a workflow that starts with Start Post Conversion.
Start Scheduled New
This is the most common option. When you schedule a works order to make new material, you can choose recipes that have Start Scheduled New workflows in them.
When you start a job in a workstation a dialogue box pops up which confirms the serial number and quantity. This is managed by the configuration of the Start Schedule New start node.
- Right-click a Start Scheduled New start node and select Edit to display the Edit Start Node input screen.
- Select a Batch Size Source. Options:
- Empty: An operator must enter the job batch size.
- Job Batch Size: The item quantity defaults to the batch size on the scheduled job.
- The Allow Job Batch Size Editing checkbox becomes active if you have selected Job Batch Size in previous field. If it's checked, the operator will be allowed to edit it. This setting is useful when the output of the process is not precise and you don't get the exact quantity each time. For example, the job is to produce 1000 marbles but the process could produce 1003 marbles in one batch and 998 in another.
Start Manual Repair
Start an ad hoc repair task on a completed item. For more information, see the Repairs documentation.
Start Scheduled Existing
You have a job to start the repair and you add the item you want to repair to the job. For more information, see the Repairs documentation.
Operation nodes
After adding a start node which defines the type of workflow to be completed (e.g. production, repair, rework, etc), you must add one or more operations. Each operation will have one or more actions.
Add/Edit Operation
- After you created your start node, right-click on the screen and click Add Operation.
- Complete the Add Operation input screen.
Add/Edit Operation input screen
The following properties can be defined for Add/Edit Operation:
Blue fields in the form are required and are flagged with an asterisk (*) in this document.
- Activity*: Defines the activity taking place at that operation (to better control / track labour).
- Name*: Clearly Identifiable name for the operation and is displayed as the header on shopfloor.
- Operation Number*: An arbitrary unique number that represents the operation number (usually starts at 10). Operations should be arranged in number order and generally, best practice is to use increments of 10 to allow for additional operations to be inserted.
- Work Centre Group*: Defines the work centres where the operation can take place.
- Work Centre: Defines the work centre where the operation must take place. We recommend avoiding using this if at all possible to avoid restricting the workflow to a specific workstation.
- Stat Profile*: Controls the information shown on the left-hand side of the screen which is displayed in the workstation when you are booked onto the work.
- Completion Mode*: Usually when you click complete it means just that. Sometimes, you may wish to leave an operation open for further booking after you have progressed to the next operation in the workflow. There are four modes:
- Complete: The operation is finished.
- Leave open (Inactive): Leave operation open for future work, but book off. It is available to book more work to.
- Leave open (Asset Load, Attended): Leave the operation open with the asset running with a person booked on.
- Leave open (Asset Load, Unattended): Leave the operation open with the asset running, with no person booked on.
- Start Condition: The condition to evaluate for if the operation is allowed to start. Note: This condition is for the whole of the operation. Actions within the operation also have start conditions.
- Complete Condition: The condition to evaluate for if the operation is allowed to complete. Note: This condition is for the whole of the operation. Actions within the operation also have complete conditions.
- Action Button Profile: The default action button profile to show in the workstation when working on this operation.
- Run mins include first off? checkbox: This will determine if the runtime minutes include the first item off the line.
- Instruction Text.... checkbox: If this option is ticked then an action will be created at the same time as creating the operation. The action will be a simple instruction with the specified text.
- Default Asset Status*: The status the machine will be in when you book onto the operation. Statuses are custom configured. An example of a status is "Running".
- Capacity Required*: The capacity required against the work centre to perform this operation. It is only used for capacity planning. For example, an oven may have a capacity of 30 sqm, and you require 10 sqm of capacity for the job. You could run 3 jobs at a time.
- The following is used for costing and costing analysis:
- Std Fixed Labour Mins: The amount of time an operator would need to take to complete the job regardless of batch size (e.g. cleaning/setup time).
- Std Variable Labour Mins: The amount of time an operator takes to complete 1 unit within a batch.
- Std Fixed Workcentre Mins: The amount of time required for equipment to complete the job regardless of batch size.
- Std Variable Workcentre Mins: The amount of time taken by the equipment to complete 1 unit within a batch.
- The following is used for planning and how much time the operation takes:
- Planned Setup Mins: This is only for planning and is the amount of time in the plan to setup the machine before the operation starts and could start before the previous operation was completed. If however, the output of the prior operation is required for this operation, then this field would be left empty, and the set up time would be included in the Planned Run Fixed Mins field.
- Planned Run Fixed Mins: The amount of time a job takes and doesn't vary with batch size.
- Planned Run Variable Mins: The planned minutes per unit produced. For example, if Planned Run Variable Mins = 1 minute per unit, Planned Run Fixed Mins = 10 minutes, then a batch size of 100 units would take 110 minutes.
- Planned Run Work Content Mins: The planned minutes where the duration scales with the amount of resource. e.g. 2 man hours of work could be completed in 1 hour with 2 people, or 2 hours with 1 person. If this value is set, then Planned Run Fixed Mins and Planned Run Variable Mins can't be used.
- Lead Time Days: Used for Rough Cut Capacity Planning (RCCP). It is an estimate of the window of time in which an operation can be done. It can be daily, weekly or monthly. Typically, it is monthly. For example, if the job is due in December and the Lead Time Days = 90 days, then the work will be done 90 days ahead of when the end product is due.
- Scrap Mode: The scrap mode for the operation. This field will only be active if you checked the Allow scrap checkbox at the bottom of the input screen. As an example, if you have a batch of 10 and you scrap one, you have two options for handling this:
- Reduce WIP Qty: This option would require an additional one being made to replace the scrapped one so that you finish with 10.
- Reduce WIP and Job Qty: This option reduces the job to 9 and you finish with 9.
- Partial Qty Mode*: This setting controls whether it is permitted to complete part of the quantity in WIP at the operation. Options are:
- Disabled: No partial completions permitted.
- New Item: A new item is created with a mandatory requirement to configure how to split the BoM according to the options in the Split BoM Mode field below. A use case for this would be a serialised product that is manufactured as a batch up until the point of partial completion. At this point, you use partial quantity to generate unique items. For example, you process a batch of radios, but at the last operation you complete one at a time and then do an individual test and attach a unique serial number to each radio. Another example is where you work on a large batch which then becomes palletised. Each pallet is unique and could follow various processes such as being packaged differently, stored in a different place in the warehouse, etc.
- Same Item - New WIP - Follow: No new item is created, so no split of parent or child material is performed. For example, you may be working on one large batch. As you finish part of the batch quantity in one operation, you move those over to the next operation where you continue working on quantity that moved over. You are splitting the visit quantities, but not the item. For example, complete an item in Op 10, Op 20 opens for them and you follow the quantity to start work on Op 20.
- Same Item - New WIP - Stay: No new item is created, so no split of parent or child material is performed. For example, you may be working on one large batch. As you finish part of the batch quantity in one operation, you move those over to the next operation but you continue working on the current operation. You are splitting the visit quantities, but not the item. For example, you complete an item in Op 10, Op 20 opens for them and another operator starts Op 20. You continue working on Op 10.
- Partial Completion Default Qty: The default quantity for partial completions. If you have Partial Qty Mode enabled, and you click Complete, a dialogue box pops up with the quantity you are going to finish. There are three options:
- Current Visit Qty: The entire quantity that you are currently working on.
- Batch size: The default batch size for that product.
- Blank: Leave it blank to allow an operator to input the quantity.
- Split BoM Mode*: This determines how you would manage the consumed BoM (child material) of a batch that is being split. This applies where New Item was selected in the Partial Qty Mode field. You will have the following options:
- None: Leave all of the consumed BoM against the original batch. This is the default setting.
- Ratio of BoM: Carry across the consumed BoM to the newly split item in proportion with the quantity of parent lot being split. This is important when making a big batch of something with tolerances. The ratios have to be within the tolerances for the split quantity. For example, a 40 ton batch of perfume requires 30 tons of ingredient 1, 10 tons of ingredient 2 and 40kg of perfume oil. Each ingredient has a tolerance. If you split off 50% of this batch, the new item should have 50% of the consumed BoM quantities.
- Entire BoM: Take all of the consumed BoM across to the new batch. This is useful when you are executing a works order in sections, i.e., you have an order for 1000 parts and are making 100 per week. Note that you are only consuming for the 100 you are executing, not for the 1000 in total. In this case, you can assume that the total quantity of components consumed when you split a quantity of 100 should be linked to the 100 you are completing.
- Required BoM: Just take the amount of the consumed BoM required by the split batch. This is best suited where components are exact quantities (e.g., each) with tight tolerances or you have completed consumption for a quantity greater than what you are splitting off, and you want to ensure that the new item created has the correct BoM.
- Slot Satisfaction Based: This mode looks at whether a BOM slot has been satisfied to determine how to split the child material between the original item and the split off item.
- If the slot has been fully satisfied then "Ratio of BoM" mode is used to split the child quantity.
- If the slot has been partially satisfied then the "Required BoM" mode is used to split the child quantity.

- Checkboxes:
- Allow concurrent users: Allow more than one user to book activity to this operation at the same time.
- Required: This will indicate that an operation is required before the item can be finished.
- Allow span off shift: A planning constraint only and controls whether an operation can be planned to start on one shift and finish on a different shift that has downtime gap between the two shifts. If ticked, for example, an operation could be planned to be started on late shift Friday, then resumed on early shift Monday morning. If unticked, the operation should be planned to be started and completed in one go. For example, baking a batch of pies.
- Allow retrospective: Allows you to manually book time to the operation after it's been recorded as being completed.
- Allow forward bookings: Allows you to manually record time to this operation before being routed to it in the workflow.
- Include on plan: Specifies if an operation needs to be included or excluded from the plan. If this box is unticked, the operation will not appear in the plan. The duration of the operation will be accounted for in the plan by the inclusion of a minimum offset between the prior operation and the next operation.
- Sub contract: This operation is sub-contracted and will be excluded from labour cost reporting.
- Allow scrap: Allows the operator to perform a scrap at this operation.
- Allow Toggle Rework: Allows the operator to toggle rework mode at this operation. For example, you are working on Op 20 and you want to record rework time against Op 20. When you done with the rework, you can toggle it back to productive time. For more information, see Rework.
After an operation is created in the design workflow screen, right-clicking on the operation displays the menu items listed below if the workflow is still in draft status. Note that for operations for workflows that are in pending approval or approval statuses, these options can be viewed using the operations button in the Workflow Manager screen.
- Edit: Edit all fields in an operation for a workflow that is in draft status.
- Edit Uncontrolled: Edit some fields in an operation without up-versioning the approved workflow. For more information, see the section on Edit Uncontrolled.
- Delete: Delete the operation.
- Actions: The actions to be performed in this operation.
- Documents: Link documents to the operation. Note that the document must already have been uploaded into the Document Manager to be available in the Add Operation File screen.
- Skills: You can assign the operation to a skill and specify if the operation is required. For more information, see the section on Workflow node skill.
- Resources: Allows you to define additional capacity constraints for the operation.
- Properties: Allows you to set the values for properties that have been defined in advance. For more information, see Property Definitions.
- Manage Flows: Access to inbound and outbound flows for the operation. For more information see the section on Workflow node flow.
- Duplicate: Create a copy of the operation.
Edit Uncontrolled
Edit Uncontrolled allows you to edit some fields in an operation without up-versioning the approved workflow.
You can access the Edit Uncontrolled in one of the following ways:
- For workflows that are in draft, select the workflow, click the Design Workflow button, right-click the operation and select the Edit Uncontrolled menu item to display the Edit Operation Node Uncontrolled popup.
- For workflows that are approved, select the approved workflow and click the Read-Only View button to open the Design Workflow screen. Right-click the operation and select the Edit Uncontrolled menu item to display the Edit Operation Node Uncontrolled popup.
The fields that can be edited are listed below. For detailed descriptions, see the Add/Edit Operation Screen section.
- Stat Profile
- Completion Mode
- Capacity Required
- All the planning and costing minutes
- Split BoM Mode
- Allow concurrent users checkbox
- Allow span off shift checkbox
- Include on plan checkbox
Actions
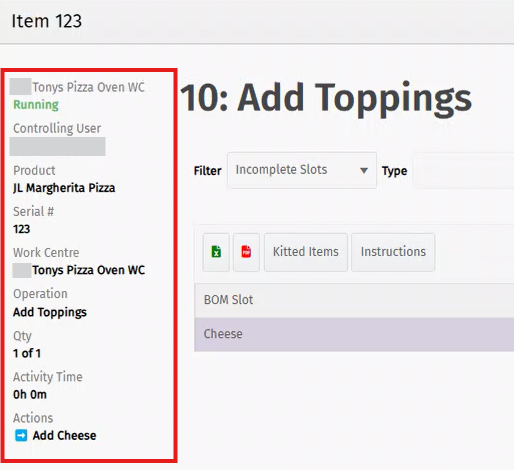
An operation must have one or more actions. A simple instruction action is generated automatically as part of the node creation unless you untick the Instruction Text box. For more information, see Workflow Actions.
Definition
An action is a step in an operation that typically defines the data to be displayed or the data to be collected during the execution of a workflow. See Workflow Actions.
Documents
Documents can be added to an operation. For more information, see the section on Files.
Workflow node skill
A skill can be assigned to an operation and you can specify if the skill is required to perform or complete the operation.
- Right-click the operation and select Skills to display the Operations Skills popup.
- Select the skill you want to assign the operation to and click the Assign button. The status on that skill will change from Unassigned to Assigned. Note that more than one skill can be assigned to an operation. By default, Required for any activity and Required for op completion will be set to True. This can be changed by clicking on the edit as described in the next point.
- To specify a skill's requirements for the operation, select the assigned skill and click the Edit button to display the Edit Workflow Node Skill popup. The mandatory fields are:
- Required for any activity: Select True if the skill is required to perform the activities in this operation. Default: True.
- Required for op completion: Select True if the skill is required to record the completion of the operation. Default: True.
For example, you would set Required for any activity to False and Required for op completion to True if any user can record the activity, but only someone with the required skill can record the completion.
Workflow node resource
You can define additional capacity constraints for an operation. The scheduling resources for work centre is implicit and is always the primary scheduling constraint. You can use the Workflow node resource function to add additional resource constraints. Examples of additional resources are labour, space and secondary equipment.
These resources need to be previously defined as a scheduling resource for it to be available to add to the operation.
- Right-click the operation and click Resources to display the Operation Resources popup.
- Click the Add button to display the New Resources popup.
- Complete the New Resources input screen.
New Resources input screen
The following properties can be defined for New Resources:
Blue fields in the form are required and are flagged with an asterisk (*) in this document.
- Group: Select a group.
- Resource: Select a resource.
- Capacity Required*: This is to specify how much or the amount of the resource is needed.
- Requirement Type*: The type of requirements. Options:
- Required for run only: The resource is required for running the operation.
- Required for setup only: The resource is required just for setting up.
- Required for setup and run: The resource is required for setting up and running the operation.
Workflow node flow
Editing the flows allows you to specify detailed configuration and conditional elements that control how the flows are to be handled. You can't have multiple conditional flows out of a start node.
You can access inbound and outbound flows by right-clicking the operation and selecting Manage Flows, or by right-clicking a specific flow and clicking Edit.

In the example above, editing the flows and defining a set of conditions in Op 10 will define which route to take from Op 10 (i.e., route to Op 11 or route to Complete). Note that the dashed arrows indicate that the sequence of flows needs to be defined.
The two methods of accessing flows differ in that the Manage Flows route allows you to sequence flows where there are more than one inbound our outbound flow. Right-clicking a flow and selecting doesn't allow this as it only presents information relevant to that flow.
Manage Flows
The Manage Flows screen shows the Inbound Flows and the Outbound Flows. You can change the sequence of outbound flows. You can edit each of the flows. The field descriptions are discussed in the Edit Flow section below.
When you click the Create Loop button, you create an outbound flow that loops back to the operation you are in. Operations that have a loop have a circular icon in the right corner of the operation. Depending on the condition specified, it allows you to repeat the operation.

To edit the loop:
- right-click the operation that has the loop and select Edit Loop to display the Manage Loop Flow input screen.
- Complete the Manage Loop Flow input screen. The fields are the same as those in the Add/Edit Flow input screen discussed below.
Edit Flow
- The Edit Flow screen can be accessed in two ways:
- Position the mouse over the flow arrow, right click and select Edit to display the Edit Flow screen.
- Right click an operation, click Manage Flows, select an inbound or outbound flow and click the Edit button to display the Edit Flow screen.
- Complete the Add/Edit Flow input screen.
Add/Edit Edit Flow input screen
The following properties can be defined for Add/Edit Flow:
Blue fields in the form are required and are flagged with an asterisk (*) in this document.
- Node: Select the node.
- Text: Text typed into this field will be displayed against the flow on the diagram.
- Relationship Type*: Planning constraint to define when to start and finish operations. Options:
- Finish to Start: Finish Op 10 before starting Op 20.
- Start to Start: Start Op 20 after Op 10 is started.
- Part Transfer: As one of the batch in Op 10 is finished, it is passed on to Op 20.
- Do Not Plan: Don't plan this constraint. For example, you don't plan to do rework.
- Min Offset Mins: Start Op 20 x minutes after finishing Op 10. This is a planning constraint that can also be used for execution constraints if used in expressions.
- Max Offset Mins: Start Op 20 no later than x minutes after finishing Op 10. This is a planning constraint that can also be used for execution constraints if used in expressions.
- Rework Status*: Defines the status of the work being completed in an operation. For more information, see Rework. Options:
- Always Non Rework: Work at the target operation is always non-rework.
- Always Rework - Prior Op Complete: Work at the target operation is always rework and the prior operation is complete indicating that the prior operation will not be repeated after the rework.
- Always Rework - Prior Op Incomplete: Work at the target operation is always rework and the prior operation is incomplete indicating that the prior operation will be repeated after the rework.
- Auto: The rework status of the target operation will be the same as the status of the source operation and could therefore be non-rework or rework.
- Use same work centre checkbox: When selected, the target operation will be performed on the same work centre as the prior operation as long as this is a valid choice for the device and operator booking the completion. It ensures we plan consecutive operations on the same work centre where applicable.
- Automatically load next node checkbox: If selected, when an operator records the completion of the prior operation, the next operation will automatically be started and the operator booked on if available at the same device. If unticked, the operator will be returned to the workstation when they complete the operation.
- Require explicit move checkbox: If an explicit move is required then the completion of the source operation will add a stock movement to a list of pending requirements. A logistics operative will be able to see what movements are needed and record when each has been completed.
- eCHR required: If selected, completion of a quantity at this operation will be recorded in the eCHR (ensure that the eCHR profile assigned has a section configured for "Operation Quantity Completion" or this will error).
Condition radio buttons*: Conditions define which flow route to take. Options:
- Unconditional (default): Do not have conditional flow (simple sequential flow).
- Case Data: Specifies the value of a case data item required to go down that flow.
- Expression: Specifies whether a flow is used based on a binary expression.
- Else: Always the last flow in the sequence when using conditional flows.
Rules for conditional flows
Where you have more than one flow out of an operation, the following rules apply:
- You need to fully define the logic otherwise it will be dashed lines.
- The last flow in the sequence has to have an 'Else' condition against.
- You need to specify which flow is planned and set all other flows to unplanned.
Files
Operators can access files that are linked to an operation. A file must be loaded into the Documentation Manager before it can be linked to an operation. Some files can be site wide which makes them available to all operations.
To add and operation file:
- Navigate to the Workflow Operations page and click the operation to display the Operation File screen.
- Click the Add button to display the Add Operation File input screen.
- Complete the Add/Edit Operation File input screen.
Add/Edit Operation File input screen
The following properties can be defined for Add/Edit Operation File:
Blue fields in the form are required and are flagged with an asterisk (*) in this document.
- Search*: The search term determines the files available for selection in the next field.
- File*: Select the file.
- Version Control*: You can specify which version to use. Options: Use latest version, Use latest minor version for specified major version, Use specified version.
- Major Version No: Depending on your Version Control field selection, you may need to provide a major version.
- Minor Version No: Depending on your Version Control field selection, you may need to provide a minor version.
- Clicking Save closes the window and displays Operation Files popup that displays the list of files added to this operation.
Added files can be edited, viewed or removed.
Operation Revision History
Changes made to the operation fields are tracked in the revision history. The changed value, the user who made the edit, and the date and time of the edit are recorded.
To access the revision history:
- Select a workflow version in the Workflow screen,
- Click the Operations button, select an operation and click the Operation Revision History button.
To display the fields you want, click the 3 vertical dots on any of the column headers, select the tab with the 3 vertical stripes, and tick the fields you want displayed. In the image below, the fixed and variable labour standards costs minutes were changed.

Note that you can find the revision history of an action by selecting the action and clicking the Design History button. For more information, see Workflow Actions.
Jump Nodes
The Jump to Task feature allows you to jump out of the current workflow to another workflow which has a Start New Task node. The Jump to Task node references the Start New Task node.
There are two scenarios for jumping to a task:
- A jump node in a workflow: When you complete the sub task and return to the main task, you will not return to the previous operation as it will always be completed. In the sub task workflow, the Sub Task Return Mode field in the End Complete node is therefore irrelevant in this case.
- An ad hoc jump to a subtask: In this scenario, you may be in the middle of an operation's actions when a subtask is spawned. In this case, when you complete the subtask was spawned, you need to know what to do on the actions on the operation that spawned the subtask. In the sub task workflow, the Sub Task Return Mode field in the End Complete node which is discussed at the end of this section, defines where to return to in the spawning operation.
To create a Jump to Task:
- Right-click in the design screen containing the workflow you want to jump from.
- Select Jump to Task and complete the Jump to Task input screen.
Jump to Task input screen
The following properties can be defined for Jump to Task:
Blue fields in the form are required and are flagged with an asterisk (*) in this document.
- Type*:
- Configured: Specify the workflow version to jump to.
- Case Data: Jump to one of several workflows depending on the case data.
If Type is Configured:
- Line Config*: Select the line configuration for the workflow you want to jump to.
- Workflow*: Select the workflow to jump to.
- Version Control*: Select the workflow version you want to jump to. Options: Use latest approved version, Use latest approved minor version for specified major version, Use specified version.
- Major Version No: The major version number of the workflow to jump to.
- Minor Version No: The minor version number of the workflow to jump to.
If Type is Case Data:
- Case Data*: Allows you to select which case data to use to decide the routing. This can be used to choose which workflow to jump to depending on certain conditions. The value of the case data must specify the ID of the start node of the target workflow. To configure case data, contact Eyelit MES support.
Parallel nodes
Parallel start nodes mark the beginning of operations that can be executed in parallel and the parallel end nodes mark the end of these operations. Parallel paths are created where two or more operations can be carried out at the same time.

The image above shows that Op 20, Op 30 and Op 40 are in parallel. A few points to note about parallel operations:
- From a planning point of view, both Op 20, Op 30 and Op 40 can be planned to follow immediately after Op 10 and they can run concurrently.
- When Op 10 is completed, you will see work to book onto for Op 20, Op 30 and Op 40.
- Op 50 will only see quantities that are complete by all three parallel operations. For example, if 5 is completed at Op 20, 3 at Op 30 and 2 at Op 40, only 2 will route to Op 50 whilst 3 of the 5 will be waiting for Op 30 and Op 40 to complete. All parallel flows need to be completed before moving to the next operation.
- Quantity edits through scrap or WIP adjustments are not supported by operations within a parallel flow.
End Nodes
End nodes mark the end of workflow. The types of end nodes are: Complete Qty, Convert, Put On Hold and Scrap.
Complete Qty
An operation is finished and the quantity is completed and put into good stock if this is the scheduled production workflow. Resulting item status is available. In the case of a spawned task, e.g., rework that is generated mid-production, the complete quantity allows the item to return to the task it was spawned from (resulting status is still WIP).
Input screen fields:
- Name*: Name of the end node.
- Sub Task Return Mode*: Determines where you return to in the workflow you jumped from. Option:
- Complete Current Action: Returns you to the action after the one that spawned the subtask.
- Restart Actions: Returns you to the first action of the operation that spawned the subtask.
- Resume Current Action: Returns you to the start of the action that spawned the subtask.
Convert
The workflow for product A is completed so we jump to a product B workflow. Resulting item status is WIP.
There is a process to convert a material from product A to product B. For example, consider a Basic PC (A) and a Deluxe PC (B), where the Deluxe model includes an additional graphics card. To convert from A to B, you need to install the additional graphics card and perform quality checks. The Start Post Conversion involves the tasks required to transform product A into product B. At the end of the workflow for producing A, a Convert end node will convert A to B, and B will appear in a workflow that begins with Start Post Conversion.
Input screen fields:
- Name*: Name of the end node.
- Sub Task Return Mode*: Determines where you return to in the workflow you jumped from. Option:
- Complete Current Action: Returns you to the action after the one that spawned the subtask.
- Restart Actions: Returns you to the first action of the operation that spawned the subtask.
- Resume Current Action: Returns you to the start of the action that spawned the subtask.
- Conversion Profile*: Select the conversion profile in the dropdown list which would have been configured in the product configuration.
Put On Hold
The material item is booked into inventory but put on hold. Resulting item status is on hold.
Scrap
The workflow is completed but the quantity is scrapped and nothing gets put into good stock. Resulting item status is depleted. You must configure a scrap reason to be recorded against the scrap transaction.